preview

Syntax Highlight Code in NextJS TailwindCSS DaisyUI

Code syntax highlighting is needed to make code more readable and understandable. In this article, you will learn how to implement syntax highlighting in your Next.js website using TailwindCSS, DaisyUI, react-markdown, react-syntax-highlighter, and more.

I have created a simple repository for this tutorial. You can check it out to better understand how to implement this on your website. The link to the repository is provided in the full code section below.

Install Dependencies

To use syntax highlighting, we need to install the following dependencies:

npm i react-copy-to-clipboard react-syntax-highlighter

For development dependencies, we need to install:

npm i -D @heroicons/react @types/react-copy-to-clipboard @types/react-syntax-highlighter daisyui tailwind-scrollbar

Add code components in your ReactMarkdown

Wrap your Markdown string with the <ReactMarkdown> component for rendering. It should look like this:

Find your ReactMarkdown component or create a new component and pass the Markdown string to it.

File markdown_render.tsx

tsx
1import ReactMarkdown from "react-markdown"; 2 3interface MarkdownRenderProps { 4 mdString: string; 5} 6 7export default function MarkdownRender({ mdString }: MarkdownRenderProps) { 8 return <ReactMarkdown>{mdString}</ReactMarkdown>; 9}

In this ReactMarkdown component, we will add the react-syntax-highlighter to highlight our code.

Adding SyntaxHighlighter to the ReactMarkdown

In the ReactMarkdown component, we can style our HTML tags by passing props to our code component. Update the code component with the following code snippet:

tsx
1import ReactMarkdown from "react-markdown"; 2import { PrismLight as SyntaxHighlighter } from "react-syntax-highlighter"; 3import { oneDark } from "react-syntax-highlighter/dist/cjs/styles/prism"; 4 5interface MarkdownRenderProps { 6 mdString: string; 7} 8 9export default function MarkdownRender({ mdString }: MarkdownRenderProps) { 10 return ( 11 <ReactMarkdown 12 components={{ 13 code({ inline, className, ...props }) { 14 const hasLang = /language-(\w+)/.exec(className || ""); 15 return !inline && hasLang ? ( 16 <SyntaxHighlighter 17 style={oneDark} 18 language={hasLang[1]} 19 PreTag="div" 20 className="mockup-code scrollbar-thin scrollbar-track-base-content/5 scrollbar-thumb-base-content/40 scrollbar-track-rounded-md scrollbar-thumb-rounded" 21 showLineNumbers={true} 22 useInlineStyles={true} 23 > 24 {String(props.children).replace(/\n$/, "")} 25 </SyntaxHighlighter> 26 ) : ( 27 <code className={className} {...props} /> 28 ); 29 }, 30 }} 31 > 32 {mdString} 33 </ReactMarkdown> 34 ); 35}

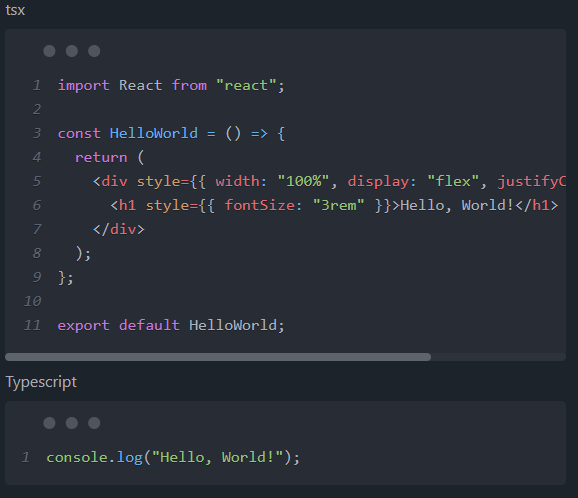
In this code, we are using TailwindCSS, DaisyUI, and tailwind-scrollbar to style the code block. It will now look like this:

When running npm run dev:

highlight-added-dev-preview.png

When running npm run build:

highlight-added-pro-preview.png

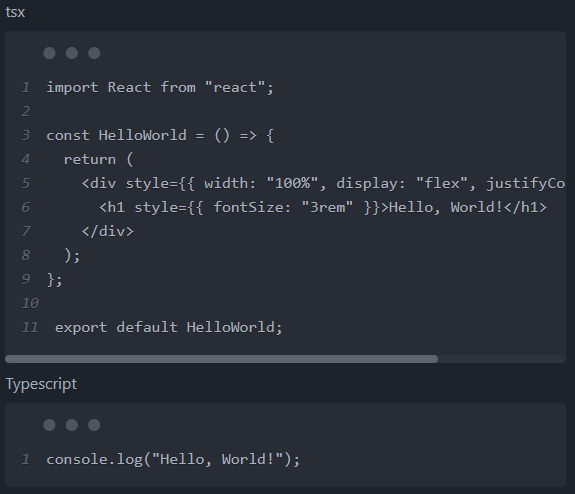
However, there is a problem with the code highlighting in npm run build. To fix this, we need to register the syntax highlighter languages in our MarkdownRender component file.

Register Language for SyntaxHighlighter

We can register languages using the registerLanguage method provided by SyntaxHighlighter. Below, I have added some popular languages, but you can add more languages. Here is the list of supported languages by Prism. Check here for the languages supported by Prism.

Add the following lines of code in the MarkdownRender component file:

tsx
1import tsx from "react-syntax-highlighter/dist/cjs/languages/prism/tsx"; 2import typescript from "react-syntax-highlighter/dist/cjs/languages/prism/typescript"; 3import scss from "react-syntax-highlighter/dist/cjs/languages/prism/scss"; 4import bash from "react-syntax-highlighter/dist/cjs/languages/prism/bash"; 5import markdown from "react-syntax-highlighter/dist/cjs/languages/prism/markdown"; 6import json from "react-syntax-highlighter/dist/cjs/languages/prism/json"; 7import lua from "react-syntax-highlighter/dist/cjs/languages/prism/lua"; 8 9SyntaxHighlighter.registerLanguage("tsx", tsx); 10SyntaxHighlighter.registerLanguage("typescript", typescript); 11SyntaxHighlighter.registerLanguage("scss", scss); 12SyntaxHighlighter.registerLanguage("bash", bash); 13SyntaxHighlighter.registerLanguage("markdown", markdown); 14SyntaxHighlighter.registerLanguage("json", json); 15SyntaxHighlighter.registerLanguage("lua", lua);

Adding Copy Code Button and Language Name

A copy code button will allow readers to quickly copy code snippets to their clipboard. This button is highly useful. Additionally, displaying the language name will help in better understanding the code.

To achieve this, we need to update the pre HTML tag in the code.

Here is the pre code for the MarkdownRender component:

tsx
1pre: (pre) => { 2 // eslint-disable-next-line @typescript-eslint/no-unsafe-member-access, @typescript-eslint/no-explicit-any 3 const codeChunk = (pre as any).node.children[0].children[0].value as string; 4 5 // eslint-disable-next-line react-hooks/rules-of-hooks 6 const [copyTip, setCopyTip] = useState("Copy code"); 7 8 const language = 9 // eslint-disable-next-line @typescript-eslint/no-unsafe-member-access, @typescript-eslint/no-unsafe-call, @typescript-eslint/no-explicit-any 10 (pre as any).children[0]?.props.className.replace( 11 /language-/g, 12 "" 13 ) as string; 14 15 return ( 16 <div className="relative overflow-x-hidden"> 17 <button 18 style={{ 19 right: 0, 20 }} 21 className="tooltip tooltip-left absolute z-40 mr-2 mt-5" 22 data-tip={copyTip} 23 > 24 <CopyToClipboard 25 text={codeChunk} 26 // eslint-disable-next-line @typescript-eslint/no-misused-promises 27 onCopy={async () => { 28 setCopyTip("Copied"); 29 await new Promise((resolve) => setTimeout(resolve, 500)); 30 setCopyTip(`Copy code`); 31 }} 32 > 33 <DocumentDuplicateIcon className="h-5 w-5 cursor-pointer hover:text-blue-600" /> 34 </CopyToClipboard> 35 </button> 36 <span 37 style={{ 38 bottom: 0, 39 right: 0, 40 }} 41 className="absolute z-40 mb-5 mr-1 rounded-lg bg-base-content/40 p-1 text-xs uppercase text-base-300 backdrop-blur-sm" 42 > 43 {language} 44 </span> 45 <pre {...pre}></pre> 46 </div> 47 ); 48};

Final preview

copy-button-language-name.png

Complete Code for markdown_render.tsx

You can find the source code for this tutorial on GitHub. Project link: https://github.com/biplobsd/code-syntax-highlighter-tailwind-daisyui

To view the code for the markdown_render.tsx file, you can click on the following https://github.com/biplobsd/code-syntax-highlighter-tailwind-daisyui/blob/main/src/components/markdown_render.tsx

You can also see the, this website implementation of this code syntax highlighter on the PNP project, which is an open-source project. Here is the link to the PNP GitHub repository below -

https://github.com/SpeedOut-Source/pnp/blob/d03965a73d42751ae282b3613289695b0df06a6a/src/components/markdown/md_render.tsx

Reference

Here are some other great blogs on this topic. I followed them to implement code syntax highlighting on this website:

Conclusion

That's it! If you have any questions, feel free to ask in the comment box below. 🔥🔥🔥🔥

I hope this helps! Let me know if you have any further questions.

Post date:
Read time: 3 min
Type: